
The Little Space Candy Shop's
Guide ToCustom Pacifiers
At The Little Space Candy Shop, we want our customers to get exactly what they’re looking for. For that reason, we created this Guide to Custom Pacis, to help our customers—and the Littles community at large—understand not just the essential parts of a pacifier, but the components that comprise a custom paci and the process for creating one.
The Basics
Before we get to the process of customization, let’s start with the basics—the parts of the Paci! A paci is comprised of a surprising number of parts, including:
The Teat
(ya know, the part you put in your mouth, also known as the nipple)
The Shield
(the largest part of the paci and what protects you from accidentally swallowing the teat)
The Handle
(that dangles from the paci)
The Center
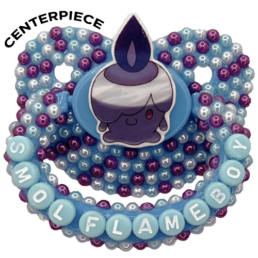
(where you can add a centerpiece or decoration)
Levels of Customization
There are three levels of customization and each level provides you with two deco styles. The name of each level of customization describes the amount of deco you will be able to add to your paci. A Little Deco is more minimalistic, A Lotta Deco is more heavily decorated, and A Little More Deco falls somewhere in between!
1. A Little Deco
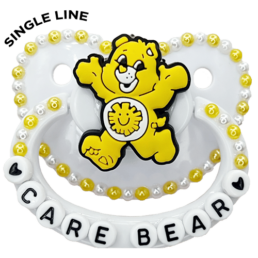
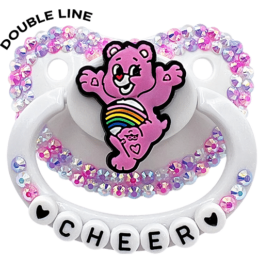
A Little Deco allows for a single or double line of deco on the paci. Here are examples of both single and double line pacis:
3. A Lotta Deco
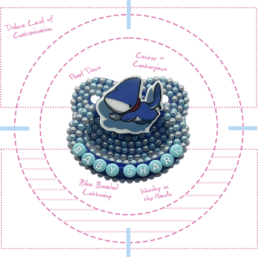
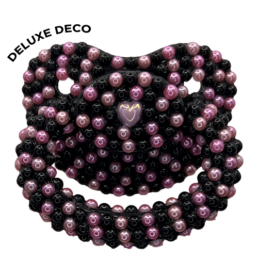
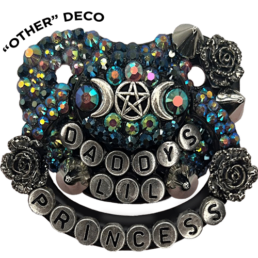
Lastly, A Lotta Deco provides the option of Deluxe level deco (i.e., packed with gems and pearls, including around the handle of the paci) or a deco style of your own choosing (a truly custom piece that you imagine). Here are examples of both Deluxe and "other" pacis:
Designing Your Paci
Once you’ve decided on a level of customization and deco style, you’ll need to specify other characteristics of your desired paci, including:
♥ The base color of your paci (which can be solid or sparkly)♥ The color of your teat (note: it can be clear)♥ Pearls, gems, or both (and what colors!)♥ Center deco (pearls, gems, centerpiece or all of the above!)♥ Wording (on handle, shield, or both)♥ The color of your lettered beads (for the wording)
Again, whew! We know, it’s a lot, but making these choices is part of the fun of creating a custom paci! You’re imagining a timeless piece of art that’s as unique as you and of your own creation (with just a little bit of help from us ;-)).
The examples to the → and ↓ will help you visualizing all these paci traits.
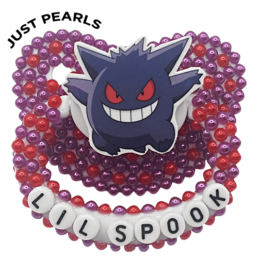
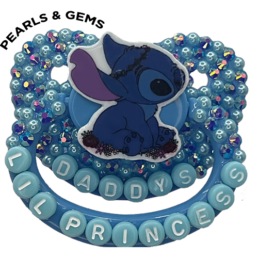
Pearls, gems, or both. Here are examples of just pearls and pearls and gems:
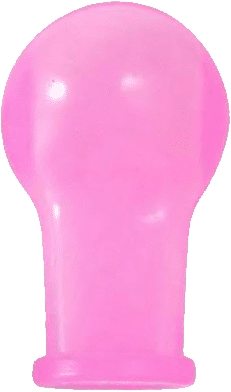
Teat color. Here are examples of solid color and clear teats:
Wrapping up!
And that’s it! As you now probably realize, there are a lot of decisions to be made when designing your own, custom pacifier. Of course, it’s having all these options that helps make each pacifier so unique and uniquely you. Hopefully, this short guide has been helpful and you’re now comfortable beginning to build your own paci. However, if you’re still unclear about anything, don’t hesitate to reach out to us!
Love, Mini.
Customizing a Pacifier
When you customize a paci, you’re required to make decisions about each of the parts, including color (such as the base color of the paci and the teat), wording (on either or both the handle and shield), and whether to add decorative elements such as gems and pearls (i.e. “deco”) and, if so, how much deco! Whew—not so simple! But don’t despair, Little one. We’ll go through the process together and provide examples so your custom paci will look exactly as you imagine it!
One of the first decisions you’ll need to make about your paci is the level of customization. See below for an explanation about our levels of customization.
Did you know?
Around the world, pacifiers are referred to by many different names! In addition to the American "paci," "binky," and "wookie," (yep, wookie), pacifiers in other countries are called a dummy (Australian English and British English), a piece, a bo-bo, a nookie, a sugar tit (whoa!), a comforter, and a soother (Canadian English and Hiberno-English).
2. A Little More Deco
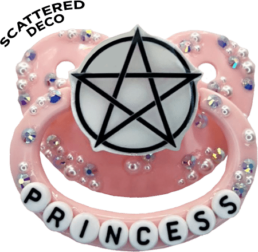
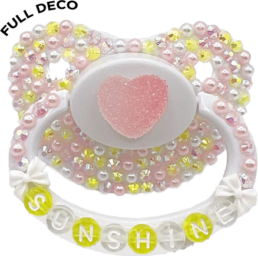
A Little More Deco allows for a scattered or full deco on the paci. Here are examples of both scattered and full deco pacis:
A Bit of History
It was around 1900 when the first teat, shield and handle design was patented in the US as a "baby comforter" by Manhattan pharmacist Christian W. Meinecke. And, Binky (with a y) was first used in about 1935 as a trademarked brand name for pacifiers and other baby products manufactured by the Binky Baby Products Company of New York.
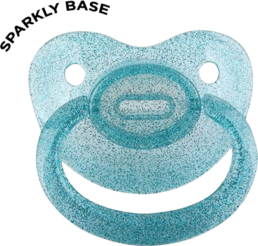
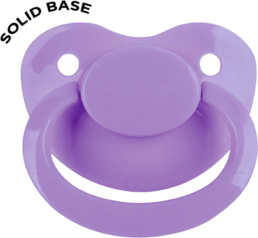
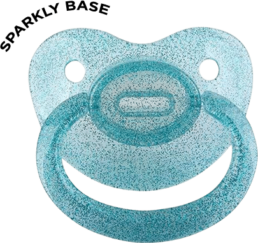
Base color—either solid or sparkly. Here are examples of both solid and sparkly bases:

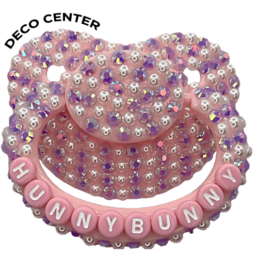
Center—deco (pearls and/or gems) or centerpiece. Here are examples of both:
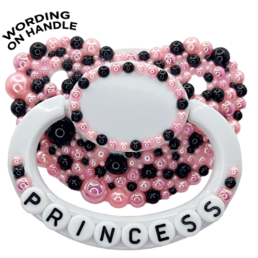
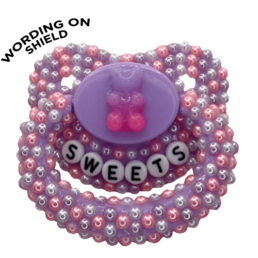
Wording—on the handle or shield. Here are examples of wording on handle or shield:
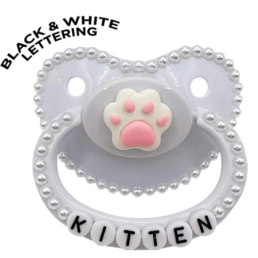
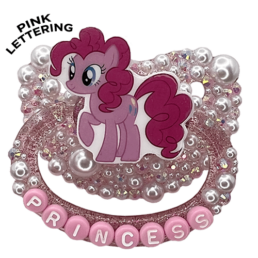
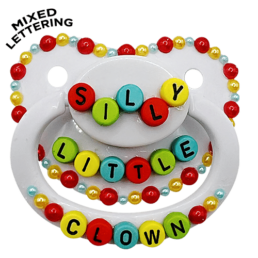
Lettering—can be a variety of colors, and even mixed. Here are examples of uniform and mixed lettering:
The Little Space Candy Shop's
Guide ToCustom Pacifiers
At The Little Space Candy Shop, we want our customers to get exactly what they’re looking for. For that reason, we created this Guide to Custom Pacis, to help our customers—and the Littles community at large—understand not just the essential parts of a pacifier, but the components that comprise a custom paci and the process for creating one.
The Basics
Before we get to the process of customization, let’s start with the basics—the parts of the Paci! A paci is comprised of a surprising number of parts, including:
The Teat
(ya know, the part you put in your mouth, also known as the nipple)
The Shield
(the largest part of the paci and what protects you from accidentally swallowing the teat)
The Handle
(that dangles from the paci)
The Center
(where you can add a centerpiece or decoration)
Customizing a Pacifier
When you customize a paci, you’re required to make decisions about each of the parts, including color (such as the base color of the paci and the teat), wording (on either or both the handle and shield), and whether to add decorative elements such as gems and pearls (i.e. “deco”) and, if so, how much deco! Whew—not so simple! But don’t despair, Little one. We’ll go through the process together and provide examples so your custom paci will look exactly as you imagine it!
One of the first decisions you’ll need to make about your paci is the level of customization. See below for an explanation about our levels of customization.
Levels of Customization
There are three levels of customization and each level provides you with two deco styles. The name of each level of customization describes the amount of deco you will be able to add to your paci. A Little Deco is more minimalistic, A Lotta Deco is more heavily decorated, and A Little More Deco falls somewhere in between!
1. A Little Deco
A Little Deco allows for a single or double line of deco on the paci. Here are examples of both single and double line pacis:
2. A Little More Deco
A Little More Deco allows for a scattered or full deco on the paci. Here are examples of both scattered and full deco pacis:
3. A Lotta Deco
Lastly, A Lotta Deco provides the option of Deluxe level deco (i.e., packed with gems and pearls, including around the handle of the paci) or a deco style of your own choosing (a truly custom piece that you imagine). Here are examples of both Deluxe and "other" pacis:
Did you know?
Around the world, pacifiers are referred to by many different names! In addition to the American "paci," "binky," and "wookie," (yep, wookie), pacifiers in other countries are called a dummy (Australian English and British English), a piece, a bo-bo, a nookie, a sugar tit (whoa!), a comforter, and a soother (Canadian English and Hiberno-English).
Designing Your Paci
Once you’ve decided on a level of customization and deco style, you’ll need to specify other characteristics of your desired paci, including:
♥ The base color of your paci♥ The color of your teat♥ Pearls, gems, or both♥ Center deco♥ Wording placement♥ Lettering color
Again, whew! We know, it’s a lot, but making these choices is part of the fun of creating a custom paci! You’re imagining a timeless piece of art that’s as unique as you and of your own creation (with just a little bit of help from us ;-)).
The examples ↓ will help you visualizing all these paci traits.
Pearls, gems, or both. Here are examples of just pearls and pearls and gems:
Teat color. Here are examples of solid color and clear teats:
A Bit of History
It was around 1900 when the first teat, shield and handle design was patented in the US as a "baby comforter" by Manhattan pharmacist Christian W. Meinecke. And, Binky (with a y) was first used in about 1935 as a trademarked brand name for pacifiers and other baby products manufactured by the Binky Baby Products Company of New York.
Base color—either solid or sparkly. Here are examples of both solid and sparkly bases:
Center—deco (pearls and/or gems) or centerpiece. Here are examples of both:
Wording—on the handle or shield. Here are examples of wording on the handle and shield:
Lettering—can be a variety of colors, and even mixed. Here are examples of uniform and mixed lettering:
Wrapping up!
And that’s it! As you now probably realize, there are a lot of decisions to be made when designing your own, custom pacifier. Of course, it’s having all these options that helps make each pacifier so unique and uniquely you. Hopefully, this short guide has been helpful and you’re now comfortable beginning to build your own paci. However, if you’re still unclear about anything, don’t hesitate to reach out to us!
Love, Mini.